
In summary:
- Blurring the line between work and rest in a studio negatively impacts sleep, demanding clear psychological boundaries.
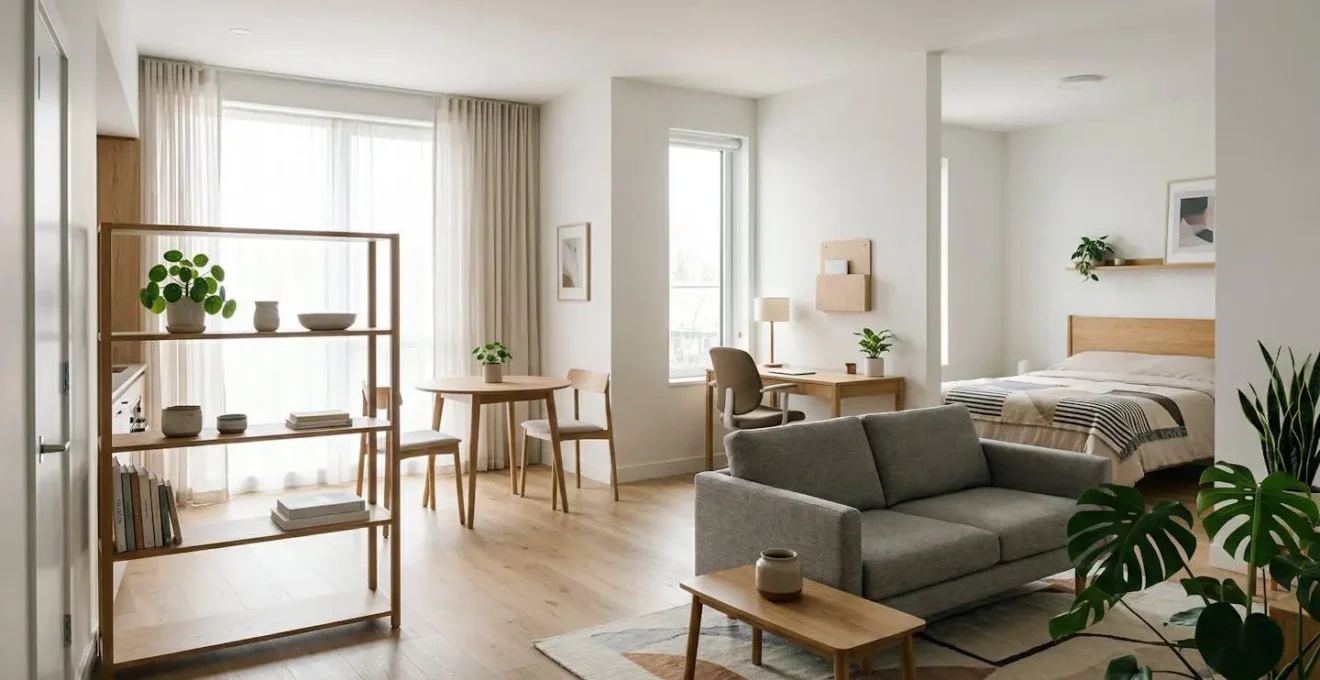
- Use open-backed shelving and strategic furniture placement to divide space without sacrificing precious natural light.
- Employ visual cues like area rugs and distinct color palettes to create perceptual “rooms” that make the space feel larger.
- Adopt minimalist storage principles to reduce “visual noise” and the cognitive load that makes small spaces feel claustrophobic.
- Design clear circulation pathways to choreograph movement and enhance the feeling of a well-planned, multi-room home.
For the young professional in a studio apartment, the dream of city living often collides with a stark reality: your office, dining room, and bedroom are all the same four walls. The lack of physical separation between your work life and your personal sanctuary can be more than just an inconvenience; it can actively disrupt your ability to rest and recharge. Many turn to common solutions like flimsy screens or simply pushing a desk against a far wall, hoping for the best. These are temporary fixes that fail to address the core issue.
The problem isn’t just physical proximity; it’s a lack of psychological boundaries. When your laptop is always within arm’s reach of your pillow, your brain never truly gets the signal to switch off. But what if the solution wasn’t about building walls, but about becoming a choreographer of your own space? The real key to reclaiming your bedroom in a studio lies not in hiding your bed, but in using architectural principles to guide perception, light, and movement. It’s about creating distinct psychological sanctuaries for work, life, and rest.
This guide moves beyond simple decorating tips. We will explore the spatial strategies architects use to define zones, enhance the perception of size, and design a functional, serene environment. From the science of why working from bed is so detrimental to the art of arranging pathways, you’ll learn how to transform your 400-square-foot box into a thoughtfully zoned home.
To help you master these concepts, this article will guide you through the essential strategies for transforming your single room into a multi-functional, psychologically comfortable home. Explore the table of contents below to navigate the key principles of small-space zoning.
Summary: A Strategic Guide to Zoning Your Studio Apartment
- Why Working From Bed Destroys Your Sleep Quality?
- How to Position Bookshelves to Create Privacy Without Blocking Light?
- Floor Defining or Wall Color: Which Zoning Trick Makes the Room Look Bigger?
- The Storage Mistake That Makes Small Rooms Feel Claustrophobic
- How to Arrange Pathways so You Don’t Bump Into Furniture?
- How to Position Your Bed for Maximum Psychological Security?
- How to Adopt Corporate Minimalism to Reduce Decision Fatigue?
- How to Position Your Bed for Maximum Psychological Security?
Why Working From Bed Destroys Your Sleep Quality?
The temptation to work from the comfort of your bed is a common feature of studio life, but it comes at a significant cost to your well-being. Your brain thrives on association, and for healthy sleep, it needs to unequivocally associate your bed with rest and intimacy—not with spreadsheets, deadlines, and Zoom calls. When you blur these boundaries, you disrupt a powerful psychological cue known as sleep hygiene. Your bed ceases to be a sanctuary for rest and instead becomes a multi-purpose surface charged with the stress and mental energy of your workday.
This conditioning process, or lack thereof, directly impacts your ability to fall asleep and the quality of that sleep. Instead of winding down, your mind remains in an alert, problem-solving state. This cognitive friction is a growing global issue; a recent analysis confirmed a notable 0.46% decrease in average sleep quality from 2023 to 2024. In a studio, where space is at a premium, creating a distinct zone for work is not a luxury—it’s a fundamental requirement for preserving your mental and physical health.
The goal is to create a cognitive separation that is just as powerful as a physical wall. By dedicating a separate area, no matter how small, to your professional tasks, you send a clear signal to your brain. When you leave that space at the end of the day, you are consciously and symbolically clocking out, allowing your mind to transition into a state of relaxation. This simple act of spatial discipline is the first and most crucial step in reclaiming your bedroom as a true haven for sleep.
How to Position Bookshelves to Create Privacy Without Blocking Light?
Using a bookshelf as a room divider is a classic studio solution, but its success hinges on one critical factor: light. A solid, imposing bookcase can create the desired privacy but may also cast your living area into a permanent shadow, making the entire studio feel smaller and more confining. The architect’s approach is to treat the divider not as a wall, but as a filter. The goal is to choreograph the flow of light while still creating a strong sense of visual separation.
The key is selecting open-backed or “ethereal” shelving. These structures, with their lack of a solid back panel, allow natural light from windows to pass through, illuminating both the “bedroom” and the living space. This maintains a bright, airy feel while the vertical lines of the shelf still provide a powerful psychological cue that you are moving from one zone to another. The way you style the shelf is just as important as its structure. Applying the “Rule of Thirds”—arranging one-third books, one-third objects, and leaving one-third empty space—ensures that light has ample opportunity to travel through the unit.
For even greater effect, consider shelving that is only half or three-quarters of the room’s height. This creates a clear boundary at eye level when seated but preserves long sightlines across the top of the room, preventing a sense of being boxed in. Positioning the bookshelf perpendicular to the main window wall is often most effective, allowing it to “catch” and filter the light across the depth of the room. This transforms the divider from a simple piece of furniture into a dynamic element that actively shapes the light and feel of your home.
Floor Defining or Wall Color: Which Zoning Trick Makes the Room Look Bigger?
When it comes to creating visual zones, designers have two primary tools: the horizontal plane (the floor) and the vertical plane (the walls). The choice between using an area rug to define a zone or painting an accent wall has a significant impact on the perceived size of your studio. While an accent wall can add personality, it often works against the goal of spaciousness. A dark or bold color on one wall can visually “pull” that wall inward, making the room feel more compact.
The more effective strategy for making a small room look bigger is to focus on the floor. Using a large area rug to anchor the “living room” zone and a different one (or none at all) in the “bedroom” zone creates distinct areas without interrupting the visual continuity of the walls. Keeping the walls a single, light, and cohesive color allows the eye to travel uninterrupted, which is the cornerstone of creating a sense of spaciousness. As ArchDaily’s design research team notes:
Lighter and cooler colors make the space appear larger. Darker colors make them appear more closed and smaller to the eye.
– ArchDaily Design Research, How Colors Change the Perception of Interior Spaces
The science behind this is fascinating; research on visual perception demonstrates that cool colors like soft blues, greens, and light grays cause the lens of our eye to flatten slightly. This physiological response makes the walls appear to recede, effectively tricking our brain into perceiving the room as larger than it is. Therefore, for maximum spatial impact, the answer is clear: define zones with flooring and unify with light-colored walls. An area rug carves out a functional island, while a continuous wall color creates an expansive visual horizon.
The Storage Mistake That Makes Small Rooms Feel Claustrophobic
In a 400-square-foot studio, every object competes for visual and physical space. The single biggest mistake that makes these small rooms feel claustrophobic is not a lack of storage, but an over-reliance on bulky, floor-bound furniture that creates what architects call “visual weight.” Heavy, solid dressers, opaque cabinets, and low-slung media consoles that sit directly on the floor create a dense thicket around your ankles, visually compressing the room and halting the flow of space.
This accumulation of visual mass at a low level creates what interior designer Kristen Pena refers to as “visual noise.” She explains, “Clutter creates visual noise. To me this translates as an overwhelming feeling like the walls are closing in.” This “noise” is a direct contributor to cognitive load—the mental effort required to process your environment. A cluttered, visually heavy room is simply more tiring to be in. The solution is to think vertically and to choose furniture that “floats.”
Opt for storage solutions with legs, like a credenza on tall, slender legs or a nightstand that is wall-mounted. This allows the flooring to remain visible underneath, creating an uninterrupted visual plane that makes the room feel larger and more open. Similarly, leveraging vertical space with tall, narrow bookcases or floating wall shelves draws the eye upward, creating an illusion of height and spaciousness. By elevating your storage, you reduce the visual weight at floor level and create a calmer, more organized, and psychologically lighter environment.
Your Action Plan: Audit Your Storage for Visual Noise
- Points of Contact: List all furniture pieces that sit directly on the floor. Pay special attention to solid, opaque items like chests, dressers, and entertainment units.
- Collecte: Inventory the items creating surface clutter on countertops and tables. Are these items essential for daily use or can they be stored away?
- Coherence: Confront your storage with your aesthetic goals. Does that bulky dark wood dresser align with your desire for a light, airy space?
- Mémorabilité/émotion: Identify storage that is elevated (on legs) versus grounded. Note how the “floating” pieces make you feel compared to the heavy ones.
- Plan d’intégration: Prioritize replacing one heavy, floor-bound item with a “lighter” alternative on legs or one that utilizes vertical wall space.
How to Arrange Pathways so You Don’t Bump Into Furniture?
A well-designed home, regardless of its size, feels effortless to move through. In a studio, achieving this sense of flow is an act of “spatial choreography.” It’s about intentionally designing clear circulation pathways, or “desire lines,” that map your daily movements—from the bed to the bathroom, the entryway to the kitchen, the desk to the sofa. The common mistake is to fill the space with furniture first and navigate the gaps later. The correct approach is to define the pathways first and arrange furniture around them.
The foundational rule for comfortable movement is maintaining adequate clearance. As a design standard, major traffic routes should be at least 36 inches (3 feet) wide. This ensures you can walk comfortably without turning sideways or bumping into corners. This isn’t just a matter of convenience; narrow or obstructed pathways create subconscious tension and can make an otherwise beautiful space feel frustrating and poorly planned. This principle is especially critical when using furniture as dividers.
For example, as one case study on interior design demonstrates, when using a bookshelf to separate a room, the opening you leave to walk through should be at least 36 inches. This is slightly wider than a standard interior door, providing a feeling of generosity and ease. To map your own pathways, stand at your front door and trace your most common routes. Are they direct and clear, or are they a zig-zag around a poorly placed coffee table or chair? By prioritizing these invisible corridors of movement, you ensure your studio functions with the grace and logic of a much larger home.
How to Position Your Bed for Maximum Psychological Security?
The placement of your bed is the single most important decision for establishing your bedroom zone as a psychological sanctuary. This goes beyond aesthetics; it taps into a primal human need for security known in architecture as “prospect and refuge.” The ideal placement allows you to have a clear view of the room’s entrance (prospect) while having your back protected by a solid wall (refuge). This “command position” subconsciously reduces anxiety and promotes deeper, more restful sleep.
In a studio, this means placing the headboard against a solid wall, preferably the one furthest from the main entry door, but in a position where you can still see the door without being in a direct line with it. Avoid positioning your bed directly under a window or with the side of the bed against the main circulation path, as both can create a feeling of vulnerability. Once the bed is positioned, you can reinforce its zone with other sensory cues. An area rug placed under the bed, extending 1-2 feet around it, acts as a powerful visual anchor, clearly delineating the sleep zone from the rest of the studio.
Lighting is another critical layer. Create a dedicated lighting scheme for the bedroom zone with a warm, low-wattage lamp on a nightstand or a soft floor lamp. Using this light exclusively during your wind-down routine helps signal to your brain that it’s time for sleep. This combination of secure positioning, spatial anchoring with a rug, and dedicated lighting transforms a simple corner of your studio into a powerful psychological refuge, optimized for rest and rejuvenation.
How to Adopt Corporate Minimalism to Reduce Decision Fatigue?
The concept of “corporate minimalism” isn’t about creating a sterile, cold environment. It’s about applying a systems-thinking approach to your belongings to drastically reduce visual clutter and the resulting decision fatigue. Every day, you make thousands of micro-decisions, and a visually chaotic environment adds to this cognitive load. By standardizing and simplifying, you free up mental energy for more important tasks. This means having a designated place for everything and, more importantly, using uniform storage solutions.
Case Study: The “Mini Stage” Principle
A design analysis of successful studio apartment transformations highlighted a key insight: creating distinct zones “gives each aspect of your life its own mini stage.” When a dedicated workspace with its own organized system is established, it signals to your brain that it’s time for productivity. Similarly, a serene sleep zone becomes a sanctuary for rest. This division of space, rather than cramping style, was found to enhance overall functionality by dramatically reducing the cognitive load associated with managing a single, multipurpose environment.
Start by investing in a set of identical storage containers, matching hangers, and uniform file organizers. Instead of a chaotic mix of shapes, colors, and brands, this visual uniformity creates a sense of rhythm and calm. Your eye isn’t forced to process dozens of different visual inputs when you open a closet or look at a shelf. This principle extends to your daily-use items. For example, instead of having five different coffee mugs, choose two or three identical ones. This small change eliminates a needless daily decision and contributes to a calmer morning routine.
The goal is to create an environment where organization is the default state. By systematizing your storage and reducing the variety of non-essential items, you are not just tidying up; you are designing a space that actively works to conserve your mental energy. It’s an investment in tranquility and focus, allowing your home to be a place of recharge, not a source of cognitive drain.
Key takeaways
- Psychology Over Physics: Effective zoning is about creating mental boundaries using visual cues, not just physical barriers.
- Light is Paramount: Use open, “ethereal” dividers to maintain brightness and a sense of spaciousness.
- Ground Your Zones: Define functional areas with area rugs while keeping walls a uniform, light color to make the room feel larger.
Your Studio, Redefined: The Blueprint for Psychological Space
We’ve journeyed through the core architectural strategies for transforming a 400-square-foot studio from a single, chaotic room into a series of distinct psychological sanctuaries. The common thread is a shift in thinking: from merely filling space to actively choreographing it. It’s the understanding that a bookshelf can be a filter for light, that a rug can be a boundary for a room, and that a clear pathway can be a source of daily calm.
Bringing these elements together—the light-filtering divider, the floor-defined zones, the elevated and minimalist storage, and the securely positioned bed—creates a cumulative effect. Your home begins to function on a subconscious level, guiding you from a state of productivity in your workspace to one of relaxation in your living area, and finally to one of deep rest in your bedroom sanctuary. This isn’t just interior design; it’s the architecture of well-being.
The final blueprint is one where every element has a purpose, not just functionally but psychologically. The result is a home that feels larger, functions better, and, most importantly, supports your mental health by providing the clear separation needed to truly switch off and recharge. You have reclaimed your bedroom not by hiding it, but by honoring its purpose through thoughtful design.
Start today by choosing one area of your studio—be it storage, pathways, or bed position—and apply these principles. The journey to a more functional and serene home begins with that first, intentional spatial decision.